
How to clean your dog's ears
It’s hard to resist reaching over and stroking your dog’s soft, velvety ears between your fingers, but have you ever considered that you should be cleaning the inside of their ears as a part of their regular grooming routine?
There are lots of things to think about when it comes to keeping your dog looking and feeling their best, including brushing their teeth, brushing their fur, trimming their nails and of course, cleaning inside their ears.
Discover delicious food your dog deserves

Luckily, it’s not too tricky to clean your pooch’s ears at home, it just might take your dog a little bit of getting used to. If only we could talk to our pups and explain what we’re doing and why on earth we want to take a look inside their ears!
So, if you’ve never cleaned your dog’s ears and you feel at a loss with where to start, look no further. We’re here to give you our go-to guide on keeping ears fresh, clean and free from any nasty infections.
How often should I clean my dog’s ears?
Ear cleaning can often be relatively overlooked when it comes to grooming our dogs, but for many dogs it’s actually super important for keeping their ears in good nick.
But how often you should be cleaning their ears all depends on your dog, their breed and their lifestyle. Some dogs manage to have naturally spotless, healthy ears without routine cleaning, whereas others need a proper cleaning regime to prevent the build-up of dirt, grime and debris.
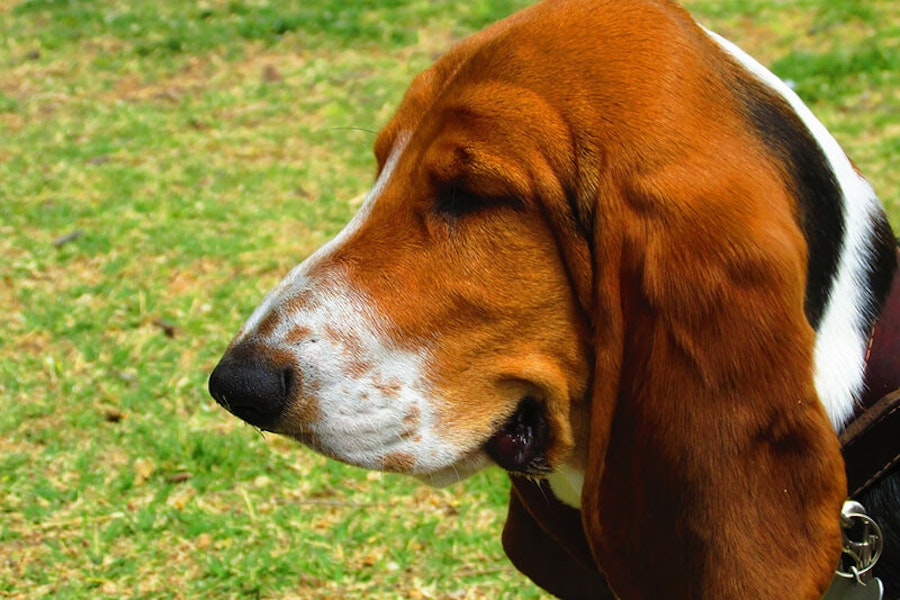
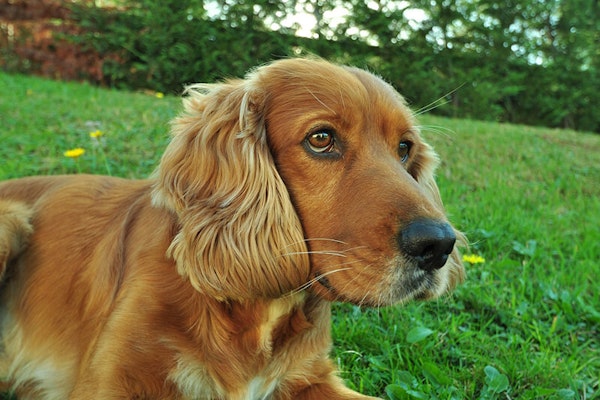
Dog breeds that have floppy, long, droopy ears like Basset Hounds and Cocker Spaniels will definitely need their ears cleaning on the regular as those adorable floppy ears are more at risk of getting infected. Droopy ears have much less breathing room and don’t get easy access to airflow, meaning that debris and moisture can easily become stuck in the ear canal, becoming a breeding ground for infection.

Also, if you’ve got a pooch that loves a doggy paddle, whether that’s in a dog pool, the sea or even just a splash around in some filthy puddles, you should be keeping on top of their ear cleaning too. The extra moisture they get in their ears makes these avid swimmers much more prone to ear infections.
Basically, how often you need to clean your dog’s ears all depends on your dog. However, it’s always a good idea to regularly check your pooch’s ears, stroking them to ensure they don’t seem sensitive to touch alongside taking a peek inside to check for any infections or ear mites that might be lurking in there, even if your pup usually has super clean ears.
So, clean regularly, but not too much as to not cause any irritation or damage to the ear canal. If you feel unsure about how much you should be cleaning, ask your vet to take a look and see if they can recommend a schedule that’ll be appropriate for your pup’s unique needs.
How to clean your dog’s ears
Thankfully, with a bit of practice, cleaning your dog’s ears shouldn’t be that hard. The worst part of the process is trying to keep your dog sat still without them doing an escape act. Although, you might be able to sort that out with a couple of tasty treats to hand!
Get them comfortable
You don’t want your poor pup to feel stressed out or upset during any of this process, you want it to be smooth, seamless and most importantly, for your dog to sit super still. However, we know this is easier said than done when you’ve got a wriggly, dramatic pooch.
Ideally, start handling, cleaning and petting your dog’s ears when they’re a young puppy, as they’ll become much more tolerant to ear cleaning when they’re fully grown. However, you might be way past the puppy stage and if so that’s fine too. Just start by trying to get them used to you touching and stroking their ears and see how they react.
Don’t go straight into cleaning their ears if they seem severely distressed and are struggling to get away from you, instead take them to the vet so they can give you and your pup a hand.
If you think your pet is going to allow you to get to work, try and ensure that you’re in a relatively confined space so that they can’t wriggle away. For larger dogs, it’ll probably be easier to do this while they’re laid or sat on the floor, whereas you might find it’s better to clean your tiny pooch’s ears while they’re sat on your lap. Whatever works for you both!
Gather your tools
Luckily, there’s not too much equipment you’ll need for this, just make sure you’ve got:
Plenty of damp cotton wool balls or pads, don’t use cotton buds as these can push the wax and dirt further into the ear canal
Dog-specific ear cleaning solution, the vet will be able to recommend specific ones if your dog struggles with infections or some that are better at preventing wax build-up
A clean towel
An extra pair of hands to help out
Lots and lots of treats
Take a peek (and a sniff!)
Now you’re all prepared you can take a peek inside your dog’s ear. Take the ear flap (the pinna) between your thumb and forefinger and lift it up vertically.
A healthy ear will probably show a little bit of pale-coloured wax around the drum. However, if you spot any inflammation, a large amount of wax, discharge or you get a whiff of a really foul smell, these are all huge indicators that something is amiss, so get to the vets to see what can be done.
Apply the cleaner
This step might come as a bit of a shock to your pooch, so try your best to keep them comfy and settled. You’ll need to apply the ear cleaning solution to get rid of all the nasties clogging up your pup’s ears.
Insert the cleaner’s tip into the ear canal, making sure not to push it too far in, as even though these applicators are designed for dogs’ ears and it’s unlikely that you’ll cause any damage, it’s always best to be careful anyway.
Now, squeeze out some of the solution. Don’t worry about holding back on the solution here, there’s a lot of ear canal that we can’t see that needs cleaning.
Massage
Now that you’ve got plenty of the cleaner in the ear, let the ear flap fall back down to its natural position and massage the base of the ears with your fingers for a good 30 seconds.
This’ll allow the ear cleaning solution to flow into the ear canal and start to break down and soften any of the gunk and grime that’s lurking down there. You’ll probably hear a bit of a swishing, squelchy noise as the cleaner moves around.
Big shake
After all this messing about, your dog will be needing a little break. They’ll probably feel the urge to shake their head from side to side and you can just let them go for it!
A big head shake will allow any excess cleaner and debris to shuffle around and move more towards the outer opening of your dog’s ear. This means that you can go back in with a piece of damp cotton wool and get rid of any loosened dirt.
And repeat!
We’re sorry pups if you’re reading this, but now it’s time to do it all again. It’s time for the other ear!
But before that, make sure to shower your dog with loads of delicious treats and praise, they definitely deserve it for being such a good boy/girl.
Medicated drops
If your vet has given you medicated ear drops to treat infections in your dog’s ears, it’s a good idea to apply those relatively soon after you finished cleaning them.
This is just so you can ensure the medicine is working its way into the entire ear effectively, rather than getting stuck on any wax, dirt or grime that was there before cleaning.
Signs your dog has a problem
Problems with the ears can occur because of all kinds of triggers, such as allergies, ear mites, infections and various conditions such as vestibular disease and otitis . Look out for symptoms such as:
Redness and inflammation
Excessively shaking their head
Ears will be sensitive to touch, if they usually love you scratching their eyes and now they’re pulling away, something is probably amiss
Scratching at their ears more than usual
Discharge from the ears that has a strong odour and strange colour
Visible ear mites (they’ll look like ground coffee with thick brown/black/red crusts and cuts around the ears)
This is why it’s always a good idea to check your dog’s ears for any sign of parasites or infection.
Also, to prevent infection, make sure to dry your dog’s ears thoroughly after they’ve been for a swim or in the bath. Bacteria and yeast thrive in hot, damp environments, and your dog’s soggy ears make the perfect place.
Recap
So, adding cleaning your dog’s ears onto your list for keeping up with your dog’s grooming is essential, being a great step in preventing any nasty things lurking in the ears and keeping your pup happy and healthy all-round.
Once they’ve gotten used to you snooping around in their lugs, it shouldn’t be too much of a chore.
Choose your location
Please confirm your location to ensure you see the correct products and shipping options.